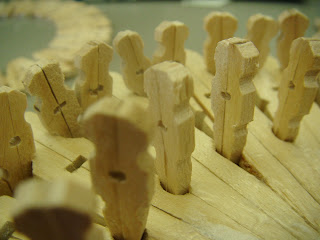
For my project at college I have to make a scarf out of pegs. I've decided to break the pegs in half, remove the springs and glue the backs ot the two halves together to create a very symetrical and organic shape, I then glue around 20 of them together in a circle to create a large cog shape. I've been experimenting with different ideas of attaching the cogs together and using some tiny pegs to add detail from all angles, here are some of the ideas I had:
Saturday, 17 December 2011
Tuesday, 6 December 2011
Clothes Show 2011 :)
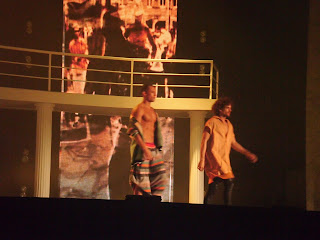
The Clothes Show was as good as ever this year, the catwalk was especially amazing! This years theme was after hours in a department store, whilst having the normal Womanswear, Menswear sections, there was also Accessories, Bridal and Street wear. With brilliant preformances from the dancers and models, here's a few pictures I took of the clothes:
I especially like the second dress in from the left in this picture because my current project at college is all about pegs and the way the material has been layered on this dress looks almost like layers of halves of pegs floating down.
While I was there with my mum, we sat down in front of the small stage in the middle of the room doing experimentations on the sewing machines. The guy presenting it asked for a voulenteer, so naturally my mum voulenteers me as I have a mouth full of pasta. Whilst I was up on stage voulenteering, I was taught how easy it is to embroid on a sewing machine, once you get the hang of it! This pictures of what I created, it was meant to be a peacocks feather but I didn't get time to finish it, not bad for my first attempt!
I love to look round the college section every year to see all the work that students have done and what the colleges offer, although its always a shame that there isn't enough work on show to look at becasue its hard to get a feel for the universities. Whilst I was wondering around we found this organisation called Craftspace Collective, where they go out and create DIY craft in public spaces so everyone can admire what they do. Unfortunatly their based in Birmingham but I will deffinatly be following there blog: http://www.craftspacecollective.wordpress.com/ to keep up to date! While I was there, I was taught how to cut an old t-shirt up so that you get about 10 meters of fabric, then I knotted it around the metal frame like a spider web. When I went back later, the front of the stand was almost compleatly covered in millions of spider webs, it looked very cool!
Wednesday, 23 November 2011
Pictures from my room
I came to decorate my room in the summer holidays, then realised that my walls looked quite bare, despite the quite rich purple I had painted them. So I decided to paint some canvases for my room to liven it up a bit. I love to paint flowers so I decided to paint a variation of different flowers, but keep them all the same crimson colour. They turned out quite well and my room no longer looks boring!!
Tuesday, 22 November 2011
Cushions
I have a habbit of making lots of different cushions that don't match at all, my room is full to the brim with them but I love each and every one. This is a selection of them, some of them are very basic cushions and some of them I have done in patchwork. I made the pink and blue ones 3 years ago when I first started to sew, the massive multi-coloured floor cushion is my sisters that I made for her bedroom floor and the tiny cushion is one I made in GCSE textiles as practice.
This is a close up of one of the cushions I made. I've used pineapple patchwork which has given the cushion a more detailed feel.
Flowery Dress :)
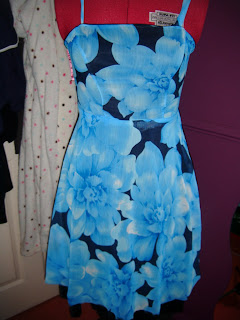
Here's a few pictures of a dress I made. I origionally made it a few months ago when my sewing machine was broken so all the edges of the lovely blue fabric frayed and the dress fell apart as I wore it. But new sewing maching, new dress! It has a black lining that pops out underneath the dress and a very swishy skirt which is a lot of fun to turn around in!
This is the back view of the dress, unfortunatly it has a very big, ugly zip because I couldn't find another, but it has been made well and fingres crossed it won't fray!
This is the back view of the dress, unfortunatly it has a very big, ugly zip because I couldn't find another, but it has been made well and fingres crossed it won't fray!
Prom Dress :)
For my first blog ever, I thought I'd share a few pictures of my most favourite thing I've ever made. My prom dress took me longer to make then I spent revising, only cost £20 in materials so it wasn't a complete bomb, and did look pretty good on the day! I must have changed the original design about 50 times before I finally settled on this the night before. It's my most favourite item of clothing, even if I only wore it once! It fitted wonderfully and didn't fall apart at all, I was very afraid it would!
This picture shows my dress in full, unfortunately its a bit creased because it's been folded in a draw for a few months, it's floor length with the excess material from the dress being used to highlight the waist band, top and the length of the shawl.
This picture is of a close up of the top of my dress. I've pleated the top so that it shows the fitted structure and when it gets to the waist band it is able to feely move so that walking isn't a problem, but it also has the pleats in to add detail to the skirt. I've sewn the pleats into the base fabric so they don't move and pull the dress out of place.
This last picture is of the back of my dress, the zip acctually does up when I wear it, but for some reason the mannequin's back seems to be bigger then mine, even though my measurements are a lot larger then that! The pleated deatail carries on to the back and round to the zip, and I inserted the zip as invisably as I could to give my dress a very neat finish.
Subscribe to:
Comments (Atom)


